Sunday, April 15, 2018

Using JQuery and the IPData API to serve content based on locale

Have you ever wanted to be able to greet visitors to your blog or project website with a personalised greeting in their own language, or to offer content or advertising links based on the country that a visitor to your site is coming from?

If so, this short tutorial post might well help you along the way with that.

You will need to be able to edit the actual HTML content of your site or be able to paste in a and HTML/Javascript block - (which blogger supports either as a widget, or as a code edit via the main interface).

You will first need to visit http://ipdata.co and click on the button to get a free api key which will allow you to make 1500 queries per day.

The code below is pretty much all you need to get started, though you will obviously need to edit it both as far as the countries codes and the actual content you want to serve goes.


<div id="UK" style="display:none"><h1>UK based content goes here</h1></div>
<div id="US" style="display:none"><h1>US based content goes here</h1></div>
<div id="FR" style="display:none"><h1>FR based content goes here</h1></div>
<div id="other" style="display:none"><h1>other language based content goes here</h1></div>


<script src="https://code.jquery.com/jquery-3.2.1.min.js">

//load jquery which makes this much easier! 

</script>


<script>

    // put in an API call to ipdata.co to get the users location data
    $.getJSON('https://api.ipdata.co?api-key={your api key}', 

function(geodata) {
        // dump the result out to the console log for debug 
        console.log(geodata);


  // now we can make some choices (you can get a fulllist of country codes here : https://en.wikipedia.org/wiki/ISO_3166-1)
  switch(geodata.country_code) {
    case "GB":
        //country code was == to "GB"
        console.log("I say old chap!");
        // toggle this visibility of the GB specific content div
        UK.style.display="block";
        break;
    case "US":
        console.log("Howdy partner!");
        // toggle this visibility of the US specific content div
        US.style.display="block";
        break;
    case "FR":
        console.log("Bonjour!");
        // toggle this visibility of the FR specific content div
        FR.style.display="block";
        break;

    // add more to suit if needed!
    
    default:
       // toggle this visibility of the catchall div 
       console.log("Hello!!");
       other.style.display="block";
  }

});
</script>


Although the above is pretty self explanatory I will break down exactly what is happening a little:

Firstly create a div for each language block, with its ID set to match the expected 2 char country codes. The important part is to set the style as being   display:none   which means by default they are all hidden. When the script runs and pulls back a country code, the case switch block will change the visibility of one of your divs from  none to block and will thus make just that div visible.

How?  Well,  next we call the jquery API.   If you are not familiar with this API, it makes things like asynchronous  (background) calls to other sites and APIs so much easier. I did start out writing this test in pure javascript but quickly decided that the extra overhead of using jquery is worth it in terms of simplicity, and lets face it blogger loads so much other stuff that one more lib isnt going to break anything!

Once jquery is loaded we can then use its $.getJSON call to grab the output from https://api.ipdata.co

This grabs the visitors ipaddr (and other details) and returns it in a JSON formatted block.


if you visit https://api.ipdata.co in your browser you will see what the return is :
{
    "ip": "x.x.x.x  "city": "London",
    "region": "England",
    "region_code": "ENG",
    "country_name": "United Kingdom",
    "country_code": "GB",
    "continent_name": "Europe",
    "continent_code": "EU",
    "latitude": 51.5142,
    "longitude": -0.0931,
    "asn": "AS60339",
    "organisation": "BT Internet"; "postal": "EC2V",
    "currency": "GBP",
    "currency_symbol": "\u00a3",
    "calling_code": "44",
    "flag": "https://ipdata.co/flags/gb.png",
    "emoji_flag": "\ud83c\uddec\ud83c\udde7",
    "time_zone": "Europe/London",
    "utc_offset": "+0100",
    "is_eu": true,
    "suspicious_factors": {
        "is_tor": false
    }
}

Essentially a list of parameters about your location - based on your public ip address, in a JSON format.  If you are not familiar with json have a look at https://en.wikipedia.org/wiki/Json  basically json is a language independent data format much like XML, which is very commonly used in web  systems to communicate data between systems using API calls. It obeys a machine and human readable structure meaning that you can look at its output and understand it, and more importantly javascript can parse it and extract data.

As commented, you get 1500 free api queries per day, so unless your site has a lot of traffic, this is pretty much fire and forget as far as the api goes.  If you do, you might consider writing out a cookie with the visitors country code when they first arrive, and check for its presence before calling the api for the geodata to save traffic.


(By the way,   $.getJSON('https://api.ipdata.co?api-key={your api key}',       is not a typo - if you are looking for the closing bracket its down at the bottom of the script)

You are probably wondering how we get the return from that?

well the function call on the next line :  function(geodata){    collects the return from the api-call and assigns the raw json object to the variable geodata.


We dump that out to the console.log for debugging purposes. Your browser will usually offer you the ability to inspect the page and give you console log data as part of its output, but that is beyond the scope of this tutorial. If you need more info about this google is your friend :)

OK, so we assume at this point (and you might want to trap some errors if you are an advanced user and make no assumptions!) that geodata is now a JSON formatted  object. This means we can use simple object orientated code to get at the info that we need - ie: the country code

And to do this we assume that geodata.country_code will contain the two char international country code conforming to ISO_3166-1, and thus we can make a simple  case-switch decision tree using:

 switch(geodata.country_code)

and provide a case for any countries we want to serve specific content for using:


case "GB":
        //country code was == to "GB"
        console.log("I say old chap!");
        // toggle this visibility of the GB specific content div
        UK.style.display="block";
        break;

for each country code. where the case statement matches the country code, the console log simply records a suitable remark to identify the country.

The important part is UK.style.display="block";

This changes the visibility of one of the divs lower down to block, meaning it suddenly becomes visible, whereas all its counterparts remain hidden.


If none of the case statements find a match, then the default scenario is launched by making the div with the "other" id visible. This allows you to have a catchall greeting/block/advert in place for visitors from parts of the world you just didn't figure would pay your site a visit.

and that's about it as far as the javascript goes.

That all sounds complicated, but really isn't

You can experiment with any of the key and value pairs eg: currency and GBP in the same way, but beware of the actual lon/lat info reported - Im certainly not in London right now, though my ISPs core switch is. If you need finer grain geolocation info then you can look at the HTML5 geolocation system, but be aware that unlike the above script which is silent, that asking for more high resolution geo loc info via html5 will bring up a prompt in the browser for a permission.

I hope that's a help getting started with your location specific greetings  I will leave you with https://www.omniglot.com/language/phrases/hello.htm   and the request "do no evil". This script is not to discriminate, but to make more inclusive. I have travelled through many counties in the world now, and been welcomed in all. The sooner we realise we are all citizens of earth and that artificially created boundaries and differences  are meaningless, the better for all.

Wednesday, September 18, 2013

A Nostradamus moment?

Just a couple of days back I wrote a blog post entitled MOOCs? where I also drew reference to a blog post I wrote a couple of years back where I discussed my worries that the current ICT curriculum in UK schools is not a substitute for learning Computer Science : ICT is not CS!  Which seems to have almost been prophetic when two directly related posts cropped up on the web yesterday.

The first web announcement was spotted on develop-online.net a website dedicated to development of software, games, and interactive media, which highlights the new government outlines for the new Computer Science course which is to replace ICT http://www.develop-online.net/news/45378/UK-Govt-outlines-computer-science-curriculum Which very much echos my thoughts and hopefully addresses the shortcomings of ICT as it is at present. The new curriculum  aims to deliver a structured introduction to computer science starting at KS1 and adding new concepts as well as building upon principles through to KS4.


           "The government has outlined the new curriculum for computer science in schools.

A program has been drawn up for Key stages one through four, which will mean students will begin learning computer science from early primary school and then throughout their education.

The statutory guidance states the aim of the national curriculum for computing is to ensure students can understand and apply the fundamental principles and concepts of computer science, including abstraction, logic, algorithms and data representation.

Pupils will also be taught to analyse problems in computational terms with practical experience of writing computer programs to solve them, to evaluate and apply information technology analytically to solve problems, and also ensure pupils are responsible, competent, confident and creative users of such information and communication technology.

The publication stated that such a “high quality education equips pupils to use computational thinking and creativity to understand and change the world”.
The new GSCE subject in computing will replace ICT from September 2014."


Reading through the key stage subject contents listed, this certainly looks like an improvement on the existing ICT syllabuses and will be welcomed I feel by both pupils and some educators.... 

....But there lies one of the problems...

With a course of this type, the educator - the person delivering the material will really make or break the learning experience that children have at all levels. The GCSE Computer Science syllabus really needs someone a little more "geeky" to deliver it well, someone who has a good understanding of the concepts to be delivered and an active interest in the area, as well as general teaching skills and the enthusiasm for the subject that can be passed to the pupils. I have no doubt that some - possibly many existing teachers of ICT will be more than capable of meeting the demands... But I am equally sure that many may struggle. Which sort of brings me round to my point...  How can these complex subjects be brought home to pupils when the teachers may not be fully up to speed themselves on the subject?    - MOOCs may be the answer... High quality interactive online learning material produced by the examining entities themselves. ??

...And this isnt perhaps out of the question...


The second web announcement yesterday is that Cambridge University Press announce that their GCSE Computing MOOC goes live at the end of the month (September 30th). This is a OCR accredited GCSE in computing course thats available and supported online right now, based around learning using the Raspberry PI platform.  http://www.cambridgegcsecomputing.org/about-us 

             "It's a GCSE, but not as you know it... Computing rules the world, or at least a large part of it. Cambridge GCSE Computing Online will provide free and open access to OCR’s GCSE in Computing, supported by resources from the Raspberry Pi Foundation and Cambridge University Press. Together we’re busy creating a ground-breaking site to help you make sense of the technologies and opportunities this amazing vehicle offers in industry, education and every aspect of our daily lives. Through a mixture of videos, animations and interactive exercises, the content is being designed to challenge and inspire you. We know that studying Computing is about using creativity and problem-solving to unlock opportunities all around you, inside the classroom and far beyond it."


This will be Freely available  (Free as in beer to use the linux analogy) to schools to help deliver this qualification and will provide a valuable resource, but more crucially is also available to students already in education worried that they have been disadvantaged by the current ICT curriculum. But they would have make their own arrangements to sit the exam - and it is important to stress that :  

             "No OCR GCSE Computing certificate will be available direct through the Cambridge GCSE Computing Online website but the content will help students prepare for the exam." 

So individuals interested in this qualification would need to see if a local school or college was  able to host the final examination.  Im sure that when this takes off a number of local groups will emerge, and due to the Raspberry Pi involvement it will be a hot topic in local Hackerspaces and groups, attracting interest from enthusiasts so finding enough people in a geographic area to make it worth while putting on an exam, or perhaps travelling to where one is running should not be out of the question.


In my opinion this has been a looooong time coming, and will be too late for some, but at least now there is light at the end of the tunnel for those students who are frustrated in their efforts to learn "Computing" rather than having "ICT" thrust upon them.


Sunday, September 15, 2013

MOOCs?

Nearly two years back I wrote a blog post entitled ICT is not CS! where I wrote about some of the reasons why I feel that the UK (and some other countries too) are falling behind with education in computer science. An article which caused  discussion in some circles, and has indirectly lead to several projects that I have heard about where others with similar worries have stepped in to run various projects with schools in their own areas.  Thanks to everyone who gave feedback, and especially to those who went on to do something positive.

Thankfully the situation in the UK is improving now, despite resistance and scepticism from some. There are a number of initiatives that have featured in the national press which seem to be slowly filtering into place now. There are also a growing number of technology education based events throughout the country now, though some of them take a little finding out about unless you follow the right news feeds on twitter and facebook. But they are out there!

Sadly though, its still not true today throughout the world. There are still so many places where Science and technology education is scarce or non-existent...  But thanks to widespread availability of the internet, this may not always be the case. Even if there is no local source of science and technology education there have been for a year or so now a wide range of on-line education systems developed by some of the worlds leading universities delivered and  graded for free simply to benefit the world of education. I refer of course to MOOCs - (Massive Open Online Courses).

Today I read this: http://mobile.nytimes.com/2013/09/15/magazine/the-boy-genius-of-ulan-bator.html?ref=magazine&_r=0&  which is what has prompted this post...  (credit to adafruit for the orignial tweet which drew it to my attention)

It describes the achievements of Battushig Myanganbayar from Mongolia, a country where "a third of the population is nomadic, living in round white felt tents called gers on the vast steppe". At the age of 15 "became one of 340 students out of 150,000 to earn a perfect score in Circuits and Electronics, a sophomore-level class at M.I.T. and the first Massive Open Online Course, or MOOC — a college course filmed and broadcast free or nearly free to anyone with an Internet connection — offered by the university."   The article also goes on to descibe how "Battushig’s success also showed that schools could use MOOCs to find exceptional students all over the globe. After the course, Kim and Zurgaanjin suggested that Battushig apply to M.I.T., and he has just started his freshman year — one of 88 international students in a freshman class of 1,116. Stuart Schmill, the dean of admissions, said Battushig’s perfect score proved that he could handle the work."

There can be little doubting therefore the value of these courses not only in developing countries, but the world over.

This has however raise some interesting questions about the future of education in some circles... Does this spell the beginning of the end of traditional education as some have suggested? Is it a "fad"?   Somehow I doubt that...  We have had the "Open University" Here in the UK for a number of years (albeit not for free), yet still see record attendance figures at our colleges and universities still.  I feel I should add that had it not been for the OU TV programs on the BBC back in the 70's and 80's I almost certainly would not have the interests in computing, science and technology I have now.  I tend to view these MOOCs courses in the same way - as a source of inspiration for the scientists and engineers of tomorrow.

A handful of UK colleges and universities are now offering a limited range of MOOCs, but  I think its time a lot more looked towards the production of their own MOOCs as not only a public service, but as a way of finding the brightest and best students who may otherwise not have found a way to their doors. And more importantly aiming them not only at school leavers - but at those in secondary education too... Especially if those courses had national accreditation comparable to the courses currently offered in the national curriculum.

It really is time the everyone started making education cheaper, more accessible and more meaningful to the future aspirations of our children - MOOCs may well be the means to do that.


Links:

http://en.wikipedia.org/wiki/Massive_open_online_course

http://www.openculture.com/free_certificate_courses


http://www.bdpa-detroit.org/portal/index.php?Itemid=20&catid=29:education&id=57:moocs-top-10-sites-for-free-education-with-elite-universities&option=com_content&view=article

http://ocw.mit.edu/index.htm


Monday, September 02, 2013

Time to look at a balloon project again?


Just a quick blog post from my phone, more as a "note to self" as a future project than a full write up, but perhaps it may also serve as a starting point for others who follow my blog to begin their own research...

I've looked at and dismissed a high altitude balloon project several times in the past. There have been a number of reasons, but not least of these has been the costs involved - the latex balloon, large volume of helium required to fill it and the risk of losing an expensive payload all make for an expensive flight.
However a few news posts and blog entries on the web recently have found their way to my attention, suggesting that there is a lower cost entry route to this fascinating area of research.

I refer of course to "pico balloon projects".

Unlike the more frequently reported "high altitude" flights which carry complex payloads, usually equipped with cameras to "near space" heights of around 30km using a meteorological balloon and parachute recovery system, Pico balloon projects carry a very lightweight payload - typically just a few tens of grams - and are lifted using inexpensive foil "party" balloons (£3.95!!). They make a maximum altitude of just a few km, but can under ideal conditions make lengthy flights.

The weight restriction on the payload is governed by the very limited lift available from the balloon itself, but should not be viewed too negatively as with a little ingenuity a lot of technology can be packed into a 50g mass. It does also mean that the overall cost of the payload is lower, an advantage if recovery is uncertain.

From the little bit of research I've done, it seems there are some "off the shelf" boards available (pcb designs and firmware are open source). Personally, I would probably want to develop my own flight computer - probably using an arduino as the test platform, then building a cut down version using just the required components only (which looks to be the way others have gone too).
Bellow are a very few quick links to get you started...

edit (I forgot this one!) : http://amsat-uk.org/2013/09/01/long-duration-434-5-mhz-balloon-launched/

http://ava.upuaut.net/?p=448

http://ava.upuaut.net/?page_id=199 (hardware)

http://ukhas.org.uk/general:ukhasbadgeboard

http://www.randomengineering.co.uk/  (balloons)

http://ukhas.org.uk/projects:microballoons:faq

http://ukhas.org.uk/guides:filling_foil_balloons

http://www.rtl-sdr.com/hackrf-decoding-pico-high-altitude-balloons-hab/

http://ukhas.org.uk/projects:splat

http://ukhas.org.uk/general:beginners_guide_to_high_altitude_ballooning  (general info - not pico specific)

Friday, October 26, 2012

RM20

I had a spare hour or so today while I waited for a server to finish updating, so took the opportunity to assemble the Rockmite 20 which arrived from Small Wonder Labs in the USA yesterday.

Compliments to David Benson for this great little TRX. I can confirm it worked at first power up, delivering around 250mW into 50r. Signals heard but not attempted to work anyone yet.

Now for the next phase: a 12v lipo battery pack, and casing it up with a built in paddle key in the smallest possible box. 


Im aiming for something like : http://www.qsl.net/n0rc/rm/Rock-Pile/wb9lpu/wb9lpu_20m.html  But with a built in 2Ah battery with external charge socket.


Ultra portable qrp on 20m :)

Saturday, February 18, 2012

16:49utc pass


pre-amp : update

Another couple of similar before and after passes:

With pre-amp (05:22UTC today)


Without (04:53UTC  11/02/12)


AOS and LOS seem respectively much earlier and much later - consistent with a few extra dBm arriving at the RX.

Definitely time to think about servicing the antenna and possibly getting the preamp up to masthead. I should really uprate the coax too - its only RG58.

Friday, February 17, 2012

Thursday, February 16, 2012

Pre-amp

Ive noticed a lot more noise on the NOAA15 passes recently, and looking back through the archive it seems that over the last two years the signal strength has been slowly dropping - probably down to it being time to get up on the roof and service the antenna.

This isn't an easy job, due to the WX sat turnstile being on the northernmost chimney here @ the 'NBP QTH, which is not directly accessible via ladder as it has a fragile sloping roof directly below it. Access is gained by climbing up to the apex, and then by walking the ridge to the chimney itself - scary stuff!

Im due for some roof work soon anyway - so will wait until there is some scaffolding up, then I think I may re-site the antenna to a more accessible location - at the expense of partially obstructed sky to the south.

Anyway, in a bored moment this afternoon, I quickly tacked a Garex 137MHz pre-amp into the case of the RX - yes I know it should be at masthead - did you not read the last few paragraphs??   ;)

Sigs on the most recent pass - northwards over the Azores, up towards Greenland still shows a little patterning, but is a much more solid signal than previous passes at similar times.


Pass with Pre-amp


Similar pass without pre-amp


In both of these passes NOA15 isnt much above 15 degrees over the horizon at its highest. As can be seen I have much more coverage north-south now.

Best passes are typically 90 mins before - so watch out for images between 15:30 and 17:00


Thursday, January 12, 2012

does Michael Gove read my blog?

Followers of my blog will hopefully remember the post I made back in October ( http://g7nbp.blogspot.com/2011/10/ict-is-not-cs.html ) Where I commented on the failures of the UKs current ICT curriculum to inspire children in the field of computing.

Yesterday Michael Gove called the current ICT curriculum "demotivating and dull". He will begin a consultation next week on the new computing curriculum.
He said this would create young people "able to work at the forefront of technological change".

He went on to say "Instead of children bored out of their minds being taught how to use Word or Excel by bored teachers, we could have 11-year-olds able to write simple 2D computer animations,"

(source :  http://www.bbc.co.uk/news/education-16493929 )

This is brilliant news indeed - if schools are able to back it up with good quality teaching. Sadly, in my experience a number of schools fail to teach even the existing curriculm particularly well and would require significant help with teaching a more technology rich version.

I shall continue to watch progress in this area with interest, especially as I am currently putting together a technology learning package aimed at 11-16 year olds based around a lot of the technology now being advocated as the future of ICT.

Watch this space...

Sunday, January 01, 2012

Today we are be mostly building robots

Emily has started construction of the robotic arm project. More pix and vids shortly.


Wednesday, December 21, 2011

Beacon back on

28MHz MEPT is back on as Im now back from my diving trip in Egypt.

Its currently warming up so freq is 28.000785ish MHz and will wander for best part of the day before it decides where it wants to be.

Thursday, December 08, 2011

Taking no chances

As the isobars stack up ever closer and the cat gets fed up of being blown off the window sill, its time to start lowering some of the antennas here.


Tuesday, November 15, 2011

An electronics kit for Christmas?

About this time of year I am often asked by friends who have children about the same age as my daughter "Which electronics kit should I buy for my child?"

A good question as there is a bewildering array of them out there a very quick search on Amazon brings back over a thousand results, and add to that ebay, other online sellers and the offerings of the high street toy shops and it becomes a huge  number.

So - how to chose??

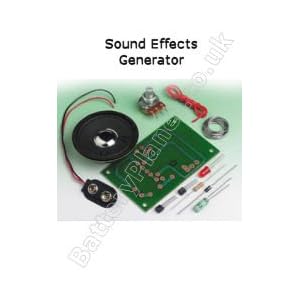
Well, You have to weigh up the level of experience your child has - if they are already past the basics and can solder then there is a wide range of specific purpose kits out there eg:


They are usually good value, Costing from a few pounds up to a few tens of pounds - (this particular  one  costs about £10  from here). Most of them are simple enough to get working and to stand some rough and ready assembly techniques. Lots to choose from  - but look out for well made kits with good documentation. A personal favourite manufacturer is Vellman who generally seem one of the better manufacturers, though there are many.


But... The chances are that if your child is already advanced enough  to be at this stage, they will be telling you what they want  rather than leaving you guessing. While these  sorts of  kits are a good introduction to soldering, its also important to note that actually these sort of kits actually teach you very little about actual electronics - much the same way as painting by numbers teaches you little about painting.  Its simply a case of finding the right component from the list and soldering it into the holes on the board.  Few kits go beyond a hurried circuit diagram and do not properly explain any of the underlying workings of the circuit.

On the whole - great for those wanting to learn to solder, or for the more advanced builder , but best to avoid if your child is a newcomer to electronics

Instead, aim for a multi project kit which includes good learning materials teaching the basics of electronic circuit design  in a progressive way - what is generally though of as an "electronics kit" rather than a "project".

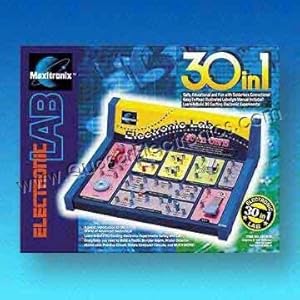
Of these,  what I call the "wire - spring linkup " electronics kits are by far the most common.

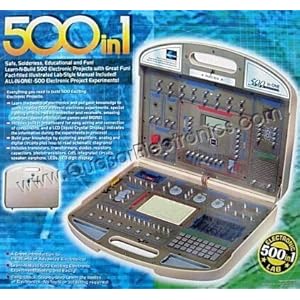
They range from small, inexpensive  kits with a limited number of options such as this one shown on the left, to very comprehensive kits similar to the one shown on the right which can cost hundreds of pounds


I call them the "wire - spring linkup" type because of the way you construct the circuits you are building. The components themselves are in fixed locations  within the kit and to join them together you link them together by trapping the ends of insulated wires in spring loaded terminals which each component is equipped with.


These kits generally offer great value for money - though the maxim about getting what you pay for is still applicable. The better ones generally  cover the basic fundamentals of electronics - the beginnings of ohms law, how components work and how they relate to each other to make a circuit. The more comprehensive ones have some interesting circuits too - which is important as your child will want to see something useful at the end of all that wire linking.

They do however have a downside. Because the components are in fixed locations on the board, when you are linking them up, the resulting rats nest of wires will have no resemblance to the circuit diagram you are following. Fault finding can be difficult, and generally understanding what is going on is much harder.

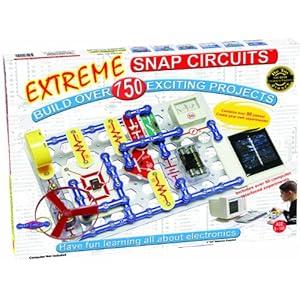
If I personally had to chose a particular type of kit to recommend overall, it would be one like this:


Why??   Well it comes down simply to this, you lay out the components and the links between them EXACTLY as it looks in the circuit diagram:


Brilliant!!


There are a range if kits by Snap Circuits, and other manufactures of this type ranging from a few tens of pounds up to a few hundreds .

While I cant comment on other manufacturers, the manuals produced in the genuine Snap Circuits kits are some of the best I have ever seen and closely follow the learning work which my daughter does at school. They are designed to be used by both learner and tutor - which is important as you will be taking a semi-active roll in helping your child with this right??  ;)


NB: links and images  are not intended to endorse any particular product / supplier - they are just the most convenient way of illustrating  this post - if any manufactures  / suppliers object to my use of their images  etc please leave me a message and I will edit accordingly.


Monday, November 07, 2011

Haynes in the oven.

Not a good start to Monday, it seems I left the haynes manual for the 4x4 on the bonnet yesterday (perils of working on car till its dark).  98% humidity overnight, plus a light frost means I had to chip it off the bonnet this morning. Duh!


Friday, November 04, 2011


Medium term drift seems to be settling down a bit now. The mark and space on my signal is about 6Hz, so as can be seen from the 15min grab I took - compared to te datum line I inserted it looks as though it wanders +/- 2Hz over the time frame.

Carrying out a similar test against WWV frequency stanards  on assorted bands and against my 10MHz standard  shows a minimum  +/- 1Hz drift attributable to the RX itself so Im reasonably pleased with that.

Thursday, November 03, 2011

Just 48mW :)

My replacement 50R termination arrived yesterday (The magic smoke escaped from the old one, it didnt like 30 watts for some reason!) ;)

So I decided to re-measure the beacon output as the usual x10 scope probes dont always give a good reading from the dummy load terminals.


But, results were much as previous - Im seeing 4.4v p2p - which into 50R is just a shade over 48mW.


To give some perspective - thats about the same output as a bright LED!


But... its enough!


Thats my 48.4mW into a 1/2wave zepp at about 6mAGL - with 10m of RG8 - so probably closer to 45mW at the antenna - arriving over with Bill - W4HBK in Florida.


W4HBK::
Grid SquareEM60kj
US StateFlorida
US CountySanta Rosa
Bearing285.7° WNW (from G7NBP)
Distance4355.8 mi (7010.1 km)           

Tuesday, November 01, 2011

Sporadically active on 10m

OK - Ive slug up a very rough horizontal zepp for 10m  - main lobes roughly E/W from here.

Freq currently is 28.000810 MHz - ie tune to 28.0MHz USB  it will be a 810Hz tone

Currently 12wpm call in CW - followed by 10x callsign in QRSS6 FSK

and the results are in...

Well.... 3 hours of ten minutely data gathering done.


Results are.... interesting!


First the graphs:


And now the raw data:


time ambient C xtal C diff C 10 min change C freq Hz relative drift over 10mins total drift from power-on
09:30 23.4 27.6 4.2
0 0
09:40 23.8 28.2 4.4 0.2 727 0
09:50 23.9 29.8 5.9 1.5 737 10 10
10:00 23.9 31.1 7.2 1.3 754 17 27
10:10 24 32.1 8.1 0.9 761 7 34
10:20 23.9 33.1 9.2 1.1 771 10 44
10:30 24 33.8 9.8 0.6 777 6 50
10:40 24 34.4 10.4 0.6 784 7 57
10:50 23.7 35 11.3 0.9 790 6 63
11:00 23.6 35.3 11.7 0.4 793 3 66
11:10 23.5 35.8 12.3 0.6 797 4 70
11:20 23.4 36 12.6 0.3 801 4 74
11:30 23.4 36.2 12.8 0.2 802 1 75
11:40 23.3 36.3 13 0.2 804 2 77
11:50 23.3 36.5 13.2 0.2 807 3 80
12:00 23.3 36.6 13.3 0.1 808 1 81
12:10 23.3 36.7 13.4 0.1 810 2 83
12:20 23.3 36.8 13.5 0.1 810 0 83
12:30 23.3 36.8 13.5 0.0 810 0 83


So...

After 3 hours the temp seems to have stabilised out as does the freq, and the temp is lower than in previous tests.

Its still however showing better part of 100Hz drift over 3 hours from power on until it settles down.

Thats fine if you are going to be leaving the beacon running for days at a time, but if you are going to be turning on and off for  a few hours at a time thats going to get somewhat annoying. It also means that during warm up you could potentially end up crashing into someone elses signal.

Based on this, as I was discussing with G0CER yesterday, I think the trick here is NOT to switch off the beacon. (Duh!)   Yes I realise the licensing implications here, what I suggest is leaving it running 24:7, but when not present in the QTH to switch the output into a dummy load - that way no (in theory!) RF radiates beyond the boundary of the property whilst the beacon is unattended.


Im also now looking at active cooling - ie popping a heatsink onto the lid of the box and then running some PWM proportional to the temp into a fan to try and hold the temp at a lower constant temp - though as others have commented on the GQRP list - it would be better to address the electronic design first with negative co-efficient caps etc.


I think Ive gone about as far as Im going to go for now with thermal tests. The bottom end of 10m isnt exactly crowded with QRSS sigs, so I guess I can afford to let it wander a bit for now.

Next priority is actually getting a signal out - so Im just cutting a very hurried 10m Zepp to sling out for now. It will be horizontal pola and be strung up roughly north south. Expected main lobes should (fingers crossed!) be heading in roughly the right directions.


More later.
.


Xtal insulation

Polystyrene added around the xtal. This is of course an imperfect solution as the thermo-couple is in contact with the diecast box and will thus be not only reading the case temp but will be radiating some of that heat inside the polystyrene cube.


Tests underway now with this mod and bead jacket between inner and outer box. Ons at 10 min intervals.

Graphs and stats later.


28MHz QRSS beacon - further tests

Sadly no time last night for anything particularly scientific, but having observed temperatures  about a dozen times last night and again this morning it looks like this:


Condx  = 7.3v supply, in diecast box, in outer box, NO beads, sitting on rack.

probe temp holds at around 7C higher than ambient temp.

As the room temp in here varies between 23 - 26C depending on if lights and monitors are on - the resulting swing on the after an hour or so from power on is 30.4 - 33.8 (from observation).

Heating appears to be significantly less than with a 12v supply.

What I plan to do now is:

a) cut a polystyrene block to fit around the xtal inside the diecast box to reduce temperature changes inside the box from any convection etc

b) re-add the beads to provide thermal insulation from room changes.


.....   Oh... and try and get a wire antenna up today :)

Sunday, October 30, 2011

28MHz QRSS beacon

Well, as promised elsewhere - a quick update on where I am with the 10m QRSS beacon project. 

I decided not to bury it!  Instead its going to live on the rack here in the shack / server room. Temps in here are fairly constant, but I decided to try adding a thick layer of thermal insulation around the beacon to elevate its temp to help buffer it from minor temp changes in here.  This may not be ideal!

Read on...

Here we see the completed beacon PCB inside a diecast box.

The device poking through the lower edge of the box is a thermocouple. It is directly above the oscillator crystal - so should give a direct readout of the temperature inside the box nearest the xtal.


This can be seen in more detail in this image.


Here we see it with the lid on the diecast box, inside its outer casing. The thermocouple is showing at that stage about 4 degrees above room temp - and a current drain of 90mA.


Now we see the digital thermometer mounted on the front panel, along with keyswitch and power LED.


The next stage was adding the thermal insulation - in this case polystyrene beads.


.... until it looks like this.


And then we quickly screw the lid down before all the beads escape!


And there it is sat on the rack.


So, tests began about 5 hours ago. Once every five minutes I recorded the xtal temp, and the frequency in Hz (audio) with my RX set to 28.000 MHz CW.

The beacon is at present TXing into a dummy load with lose coupling to the RX. (Im still torn between a half wave end fed vert and a halo when I do get an antenna up - but thats another story!)

Im using my usual studio quality soundcard (24bit) to sample the recovered audio from the RX, and used Baudline (an audio analysis tool) to take measurements of the frequency of the mark and space tones. This provides an accuracy roughly on a par with my frequency counter, (limited by the unknown drift on my RX in fact) but makes it easier to read the changing frequencies brought about by the FSK which on a counter is a bit of a pain.


yes - the FSK is a bit on the high side - about 8Hz - I was aiming for 5 but with the lid on and temp up the FSKing is also slightly increased.


These were the figures for the first 3 hours:


 (Raw data follows.)


mins  temp C  freq Hz
0     25      760
5     25.6    748
10    26.9    741
15    28.2    740
20    29.4    742
25    30.5    748
30    31.7    758
35    32.5    766
40    33.3    769
45    34.2    772
50    34.9    775
55    35.5    778
60    36.2    782
65    36.8    787
70    37.2    792
75    37.7    794
80    38.2    799
85    38.5    801
90    38.9    805
95    39.3    809
100   39.5    811
105   39.8    815
110   40.1    817
115   40.3    820
120   40.5    822
125   40.8    824
130   40.9    826
135   41.1    828
140   41.2    830
145   41.3    832
150   41.5    833
155   41.6    834
160   41.8    835
165   41.9    837
170   42.0    839
175   42.1    839
180   42.1    840


After 3 hours I stopped taking five minutely readings, and checked sporadically.

After 5 hours the Xtal temp had reached 43.5cand the frequency had reached 858Hz thats around 100Hz moved for around 20c temp change.

Although the values where beginning to flatten off, I pulled the plug after 5 hours as I feel that the thermal insulation is perhaps just a little too efficient!

Looking at the mark and space data on the display it was clear that once the xtal temp was past 33c that there was slightly more 1Hz jitter on the signal. No tests done to confirm this or the cause yet - but Im guessing that the PA transistor is sitting a fair bit warmer than the xtal and may be running away a little.

My main worry though is that as this will be operating as a MEPT (Manned Experimental Propagation Transmitter) to remain within licencing conditions it  will spend some quite sizeable times powered off when Im not physically here. The long ramp up time to stability  is not going to be condusive to a device that is turned on and off frequently. (As I am writing this the temp has dropped by over 3 degrees in 8 minutes, showing that cool down is much swifter than warm-up).

I think I may need to add a simple heater circ to the diecast box for more rapid warm ups, and to limit the upper temp to about 30c.

More tests will follow...

Saturday, October 22, 2011

ICT is not CS


Its been a while since I did a wordy post, but having just watched a short video from the beebs archive, its prompted me to comment on something I feel strongly about:

ukict != cs;

Sadly thats not going to mean a lot to most people, and therein lies my point.

In my opinion the current UK schools curriculum subject ICT is not fit for purpose. It is simply not a substitute for teaching Computer Science. It is creating a generation of mindless point and clickers.


And it seems Im not alone in this worry. Have a look at http://news.bbc.co.uk/1/hi/programmes/newsnight/9612063.stm


Some schools even struggle to teach the basic ICT curriculum particularly well, but in reality what they need to be looking at is a return to teaching Computer Science. Scary - but its time for a rethink.

When I was growing up, if I wanted to play a computer game, I had to write it. Yes really write it - type in the code, line by line. I realise that for most people under the age of 35 thats kind of shocking now, but really thats what we had to do. The thing is, the need to do that, to develop your own software is now long gone. These days you just download an app yes??, or bung in a CD.....?

But ask yourself - where do these apps come from??? Someone has to write them.... That would be the software developers.

At school us forty-something developers did "computer studies". We learned all the basics (pun possibly intended!) of the nuts and bolts of how to write software. We also covered fundamentals such as boolean algebra and binary math. Yes, I know they are mentioned in the current curriculum - but thats it - they are just mentioned.

There is a whole generation now  who are, and probably only ever will be IT consumers rather than IT creators. We are educating the masses to blindly use software created by others rather than innovating new software ourselves.

We have to tackle this with our current teenagers or risk a huge skills gap in the future.

As followers of my assorted blogs will know, we have an "Emily". She is our daughter, and we think she is amazing. In a lot of ways however, she is very typical. Very typical of a bright 13 year old. She does well at school, but would take exception to being thought of as "Geeky".

The thing is that despite this non-nerd status, with a few sessions of goal based,workshop style teaching at home and a LOT of support on the practicalities of turning "what-if" into "how-to", Emily is able to turn out things like this:


For those of you who havent already seen it, thats live and historical data coming from a set of network connected sensors (which emily mainly designed and built) being collected, stored, graphed and pushed back out to the web using software that Emily herself wrote with very little help.

see http://myweatherblog.wordpress.com/livedata/ - you can read about some of the technology behind it here : http://myweatherblog.wordpress.com/equipment-4/

With project-based workshops and goal-based motivation as the teaching method Emily has gained a good enough basic grasp on simple digital electronics, networking, programming and databases to achieve all this in a little over 12 months - probably equivalent to 3 terms classroom time.

If im honest, I would say with the same level of help MOST children in Emilys class at school would be able to cope with the key aspects of how this project works and as a group project would find it both attainable and enjoyable.

The import thing here is that actually projects like this tick so many of those all important ticky boxes for cross curricular attainmnet and key skills that it makes your hair curl!

So what is the current ICT curriculum asking them to do? Well, a lot of it focusses on skills like how to open a spreadsheet, create a powerpoint slide, turn the computer on and off without breaking windows. All valid skills - as an IT consumer - but not exactly inspirational for the next generation of Uber Developers.

An understanding of the mechanics of computing is not something we can just leave until AS level and hope that a few "bright" ones will stick with ICT long enough to want a career out of it. And a couple of lessons spent creating a web page with WYSIWG editor is NOT learning about programming. The science part of computing has to be there from the earliest days of learning.

So... what can we as parents do? Well, I suggest you buy one of the many workbooks available for the current curriculum and make sure that your childs school is teaching the existing curriculum well. But also to see what is not being taught.


We can of course lobby the government to rethink computing education in the UK - but educational reform tends to be a slow process, so we need to think about the short term too.

If you have the skills, you could do what a lot of us do and not only help our own children, but to volunteer to help run afterschool classes and groups to bring technology to the kids.

But, if I had to chose something to say to all parents to help their kids WANT to take a deeper interest in IT and technology - I suggest the age old way of teaching kids techy stuff - make it fun!


Download a copy of Scratch developed by the Lifelong Kindergarten Group at the MIT Media Lab (its free! - and windows/mac/linux flavours) and buy them a copy of this: Scratch programming for Teens


If you were paying close attention to the BBC video at the top of this post you might recognise the above image.

To pinch a quote from the scratch website:


"Scratch is a programming language that makes it easy to create your own interactive stories, animations, games, music, and art -- and share your creations on the web.


As young people create and share Scratch projects, they learn important mathematical and computational ideas, while also learning to think creatively, reason systematically, and work collaboratively."

Scratch is the Lego(tm) of the programming world. You literally drag and drop building blocks of code together graphically to add interactivity to objects. Its quick, easy and intuitive. But it is based on real programming constructs - decisions, loops, conditionals, variables, objects and actions.

Scratch was the first programming language Emily learned. I didn't teach it to her. She learned it. I simply installed a copy on her PC and said "hey - check this out - its kinda good". And she got it... She just Got It. Yes, I've offered the occasional bit of help now and then - and perhaps suggested she look again to see if the was a simpler way of doing something. But Scratch teaches itself.


Based on what She has learned, Emily now programs in varying degrees of depth - Arduino, C, Processing, PHP, MySQL and the Linux shell Bash. She still has a lot to learn, but she has the fundamentals and thats the key. She knows how to do useful stuff, and knows how to find out stuff she doesn't know. And that the core skill of anyone working in software design, or electronics, or engineering etc etc etc.

And if you are thinking that OK Scratch looks cool but what does it lead to?? - well... as commented above Emilys grasp of programming constructs come from her introduction via scratch, but sticking with graphical block programming for a moment further - the concept has been carried forward - again via MIT and Google - to produce App Inventor - the graphical development language for Android based mobile phones and other devices.


App Inventor will be Emily's development platform for a whole host of new projects over then next couple of years.

So Go ON! Get your kids into something thats going to change not just their world - but everyones. Who knows, the next app you download to your phone might have been written by your son or daughter!


Some more links (from Emily's bookmarks) to play with:

http://makezine.com/
http://arduino.cc/
http://mindstorms.lego.com/en-us/Default.aspx
http://www.adafruit.com/blog/about/
http://www.oomlout.com/a/
http://www.modk.it/
http://processing.org/
http://hackaday.com/
http://www.instructables.com/


Friday, October 21, 2011

Ts140 repair

I had a spare few mins this afternoon so I thought I would tackle the intermittent audio fault on my TS140. Previously I had traced it down to the external speaker socket on the rear - it seemed to be dependant on the angle of the audio jack as to weather audio came out of the external speaker - but if unplugged audio did not always return to the internal speaker via the make/break contacts in the socket.

I was hoping a squirt of switch cleaner was going to solve the problem, but no - as I feared it was a broken joint on the PCB under the socket.


Every last nut and bolt out to get to it and the zillion and one mini connectors undone before I could lift the PCB to get to solder the joint. Im not usually squeamish when it comes to repairs, but this one had me sweating! The TS140 was built between the times when you took your rig apart with a hammer, and recent tech where basically you dare not take a bolt out of the case - (and even if you did what would you change?) So it has an overly large number of interconnections and lots of scope for making existing dry joints worse.

Thankfully it now seems happy - Even with the lid on!

Thursday, September 22, 2011

Emily has updated the equipment information section of her blog ( http://myweatherblog.wordpress.com/equipment-4/ ) to reflect the recent sensor array changes - a full pdf download report with lots more pix, circuit diags and source code will be along shortly...

Saturday, September 17, 2011

Tuesday, September 13, 2011

Arduino - HTF3223 Humidity Sensor

Over the past six months or so I have been helping my daughter with a remote mounted sensors project to supplement the info from her weather station on her blog. Light and temperature sensing via the analogue ports has presented no problems (LDR and TMP36), but when it comes down to humidity sensing its a bit more complex.

Although you can buy some inexpensive resistive humidity sensors, these are not suitable for DC reading and have to be read using an AC waveform at a few KHz to avoid eventual damage to the devices.

There are ready made humidity sensor system which use SPI/I2C bus communication which give very good results, but looking at them,they tend to be a little pricey and the required source code is a bit beyond the level of Arduino coding Emily is happy with.

After a LOT of digging I came up with the Humirel HTF3223 Sensor.

Unlike other sensors, it provides an analogue value out which is linear with the relative humidity, but rather than a voltage it outputs a variable frequency square wave at between 8 and 10KHz.

So - how are we going to convert frequency to something useful??

Well there is a frequency counter lib available, but for a top frequency of around 10KHz its a bit like using a sledgehammer to crack a nut.

After a bit of googling I found several examples of using the pulsein function. The following code gives a very quick example of reading the frequency from the humidity module, and using a simple conversion formula, convert it to relative humidity.


/*

Humidity sensor test for HTF3223 humidity sensor

By G7NBP - Chris Williams

V0.0.1 28th - May 2011

The inexpensive HTF3223 sensor (ebay etc) provides good accuracy relative humidity
sensor readings (typically +/- 5%) and has a simple linear output.

Its output however is in the form of a variable frequency proportionate to the humidity.

The formula for convertion is RH = (9740/Freq)/18

Although it is possible to use the frequency library to collect the frequency, this
is somewhat overkill as the freq is not expected to be above 10KHz.

Instead the pulseIn function is used and frequency averaged over 4096 counts.


connect H pin on  HTF3223 to digital pin 7

*/

const int hpin = 7;  // the sensor pin

 
void setup() {
  Serial.begin(9600);
  pinMode(hpin, INPUT);

}

void loop() {
  long sensorValue = getFrequency(hpin);    // get the raw sensor frequency
  long humidity = convertToRH(sensorValue); // convert it to RH%
  Serial.print("S:");
  Serial.print(sensorValue, DEC);
  Serial.print(" H:");
  Serial.print(humidity, DEC);
  Serial.println("%");
  delay(3000);
 
}

long getFrequency(int pin){
  #define SAMPLES 4096
  long freq = 0;
  for(unsigned int j=0; j<SAMPLES; j++) freq+= 500000/pulseIn(pin, HIGH, 250000);
  return freq / SAMPLES;
}


long convertToRH(long sensorValue){
  long rh = (9740-sensorValue)/18;
  return rh;
}